Template:Tumok the Wretched mechanics
Zur Navigation springen
Zur Suche springen
↑ 1.0 1.1 1.2 Video, 2023-05-31 (11:59).
↑ Video, 2023-05-31 (12:22).
↑ Video, 2023-05-31 (12:45).
↑ Video, 2023-05-31 (12:50).
↑ Video, 2023-05-31 (12:08).
↑ Video, 2023-05-31 (12:09).
↑ Video, 2023-05-31 (12:13).
↑ Video, 2023-05-31 (12:20).
↑ 9.0 9.1 9.2 Video, 2023-05-31 (12:56).
↑ Video, 2023-05-31 (13:28).
↑ 11.0 11.1 11.2 Video, 2023-05-31 (12:34).
↑ Video, 2023-05-31 (13:00).
↑ Video, 2023-05-31 (13:01).
↑ Video, 2023-05-31 (14:02).
↑ 15.0 15.1 Video, 2023-05-31 (14:16).
↑ Video, 2023-05-31 (14:06).
↑ 17.0 17.1 Video, 2023-05-31 (14:15).
↑ Video, 2023-05-31 (14:22).
↑ Video, 2023-05-31 (15:26).
↑ Video, 2023-05-31 (16:01).
↑ Video, 2023-05-31 (15:34).
↑ Video, 2023-05-31 (15:49).
↑ Video, 2023-05-31 (15:45).
↑ Video, 2023-05-31 (16:03).


Phase 1 mechanics
Phase 1 includes physical attacks, including attacks with his tree.[2]
- Tank Spike.[3]
- Impales his totem on his main target, small AoE damage.[4]
- Stomp.[5]
- Slams foot down, ST, main tank dealt 5%.
- Foot Swipe.[6]
- Swipes foot forward, cone AoE, 5% to main tank. Seems like his auto-attack.
- Trunk Slam.[7]
- Slams the trunk down in front of him, likely small AoE.
- Charge.[8]
- Charges through a random target. May be range/proximity based.
- Dealt 250 damage to Kleriker. Took Waldläufer from 96% to 73%.
- Knocks down for 2-3 seconds.
- Uproot.[9]
- Happens after every charge attack. Massive frontal-cone AoE attack of roots that stuns all players in range[9] for ~1 second and dealt 400 damage to Magier.[10]
- Took Cleric from 100% to 70%. Took off-tank from 100% to 73% and range-tank from 99% to 71%.[9]
- Fungus Heal.[11]
- Pulls fungus from his trunk to heal himself from 246, 308 to 261, 239 ~15,000/5% Health.[11]
- Fungus Spew.[11]
- Spews fungus out of his mouth after healing with Fungus Heal. Large frontal-cone AoE. Dealt 10% to main tank. Dealt 14% to off-tank, who was inside boss' hitbox behind.
- Spirit Roar.[12]
- Roars and summons a Spirit Wolf add.[13]
- Toward the end of phase 1, it looks like tanks lose aggro or boss shifts aggro to others.
Phase 2 mechanics
Phase 2 begins by Tumok placing his totem on the ground.[14] This may happen when Tumok reaches below 190-200k, after 2 minutes of fighting has elapsed, or 4 charges have happened.
- He's put this tree down and there are going to be these healing caps that appear; and those are going to be a priority objective for DPS to take down before they grow to full size. Because, if they do, he's going to get healed for a huge percentage of his health.[15] – Jason Neal
- Tumok's Gaze.[16]
- Focuses on a random target and pursues them. Stomps.
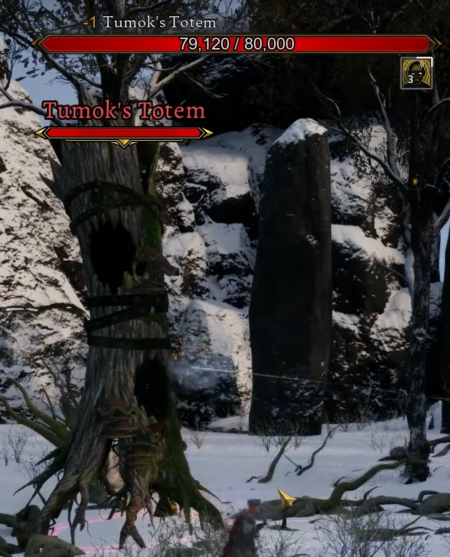
- Tumok's Totem.[17]
- Totem trunk with 80,000 Health, shoots tendrils out in 8 different paths that slow players that stand on them and deal {20} ticking damage.
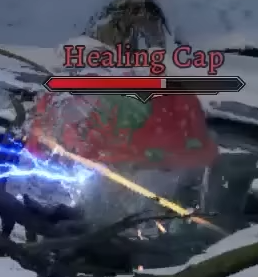
- Healing Caps.[17]
- Haling caps must be taken down before they grow to full size. If fully grown, Tumok will walk to them and Stomp on them to heal for a large percentage of his health.[18]
- Pulses AoE heal if destroyed after a certain point. Players can also take advantage of this.[15]
Phase 3 mechanics
Enrages after the Totem is broken and enters Phase 3.[19]
- Tumok's Rage.[20]
- Increases damage/speed and changes mechanics to include Enraged attacks.
- Overhead Slam.[21]
- Massive 360° AoE that deals 200 damage over a near infinite range.
- Each subsequent cast adds an additional slam starting at 2.
- Enraged Jump.[22]
- AoE Jump to a random target. Took Mage from 96% to 60% and ranged Tank from 82% to 53%.
- Enraged Slap.[23]
- Frontal-cone AoE slap. Dealt 10% to main Tank. Took ranged Tank from 53% to 29% and Mage from 60% to 23%.
- Enraged Spirit Roar.[24]
- Roars and summons a Dire Spirit Wolf to its aid. Periodically summons additional Dire Spirit Wolves over time.